Saturday, 2 March 2019

Event : St Patrick's Day Event - Monria

St Patrick's Day Event

Cthulhu's Chaotic World

On Monria


Over the last year, the aggression of the creatures on Monria have escalated. Discoveries that have put Monria on alert more than ever before. Cthulhu-associated entities have made their presence known, even if only briefly.

If you are planning on celebrating this annual event with us, please come as prepared as you can, because there is no way to predict just what chaos will happen where and when.

MOON MARCH MADNESS

Note: Clocks changed ahead 1 hour on the 10th of March in many countries.
  • Meet at DSEC Forensics - Sat, Mar 16th and Sun, Mar 17th - Time 10:00 EU time.
  • Monria Staff and Monria Community Assistance Team (MCAT) will be present for specific interaction.
  • There will be spontaneous activities and random giveaways prior to each day's events.
  • During the course of this 2-day event, spot prizes may be randomly given out.
  • There will also be random global giveaways -- always Expect the Unexpected
  • Wear your most Irish-related fashion (Orange, green and white), be creative, there will be Irish-related fashion prizes.
  • Throughout the event watch the Monria chat channel for instructions and announcements.

Twitch Streamers are encouraged to stream during the event, list yourself as a Monria Twitch Streamer at the Monria forum herelet us know when you will be active with your stream so that it can be shared on social media


ADD THE #MONRIA CHAT CHANNEL IN GAME

  1. Press the ENTER key and type "/join #monria".
  2. Right mouse click on MAIN TAB in the chat box
  3. Click NEW TAB and name it "Monria".
  4. Right mouse click on "Monria" tab just created.
  5. Select #MONRIA and enjoy the company of the Monria community.


FREE TRAVEL FOR MONRIA BORN

The Yamoto mothership use! offering free space travel to Monria and back for this event if you was born on Monria.

If you are not a member of the Yamato guest list, please sign up here and follow the instructions "exactly" and post your full in-game name and if you are Monria born.

If you are not Monria born usual fees apply. 7 PED during our regular Friday and Sunday travel schedules.


Click here to get more information about the event and times at the official post on the Monria forum.


Friday, 1 March 2019

Guide: Trading Basics

This guide will teach you about the basics of trading, this is not only good knowledge for traders, but a fundamental aspect to all professions. Whether you are a hunter, miner or crafter, your success is down to your ability to trade.


Even if you are not a trader, you should make friends with a few traders! It is always better to have a selection of people you can sell to. Even with harder to sell items, simply store them and wait for that one person willing to pay you a markup!

Traders in Entropia not only always pay a markup on items, but many resellers sell via the auction generating a revenue for the planet owners and Mind Ark via auctions fees, one of many parts sustaining the existence Entropia.


Calculator At The Ready

It is always to handy have a calculator ready, most people have a phone to hand, and every phone has a calculator, even the older phones.

Limited And Stack Items
In the places where you find traders trying to buy and sell items, you will normally see a percent given for limited and stacked items. This percent represent the amount to pay compared to its trade terminal value.

For example, if you are buying or selling 2.00 PED trade terminal value of an any item for 102%, 2.04 PED is what should be payed.

To calculated this on a calculator, you would input: "2.00 x 1.02"

"TT Value x Percent".

Unlimited Items
Because unlimited items can be repaired at the trade terminal for PED directly, percents can not be applied in the same way as limited items or stacks.

The method for selling unlimited items is simply the trade terminal value of the item plus the desired markup.

"TT Value + Markup".

If you have 30 PED and want to buy an unlimited item with a max trade terminal value of 25, buying the item for "0+5" and having to repair "25", is the same as buying "25+5" at full value. They both will cost you 30 and the outcome is the same.


Local Trade And Trade Channels

In the bottom left corner of the chat window, to the left of where you enter text, you will be able to change chat channels by clicking on the chat channel link.

[Local] chat is designed for general talking, and [Trade] is like [Local] but designed for calling out wares and trading.

There are a number of custom global channels also designed for trading, which allows you to call out to a much bigger group of people, but because many use these channels, they can be very active with other traders, and messages move up faster.

If you wish to contact someone, simply click on their name link in the chat window. To send someone your location in a way point link, write "/pos" or "/p" into the chat window.

To learn more about the chat interface, click here.


Methods Of Trade


To trade with someone once you have located them, hold right click or "F (Default Control)" for a few second on their avatar. Once the context menu appears select private trade.

When the trade window is open, drag your offer to the bottom of the trade window from your inventory. You will see what the other person is offering in the top of the window.

Once both have agree to a trade, click on the tick button at the bottom of the window. Next a confirmation screen will appear, double check what are about to trade, and if you are happy click on the tick at the bottom of the window. The "C" button will clear the window. The "X" button will close the trade.

Your PED Card is found in the the top tab of your inventory. To exchange PED, right click on your PED Card in your inventory, then click Extract PED. To put PED as coins back on your card, drag and drop the PED to your card, or right click the coins in your inventory.

PED does not go directly go to your PED Card after a private trade, they will appear in your inventory as coins. The trader terminals and auctioneers only deal with what is on your PED Card, and ignores PED in coin form.

PED from auction sales will go directly onto your PED Card. PED from land areas, shop pads, shop and deeds will go to your "PED Flow Center", which can be transferred directly to your PED Card.

Auctioneers are located at many of the settlements and outposts across Entropia. The auctioneer will display what is being sold on the auction, and for a small fee, you can have deliveries set up from other planets. You can also place items on the auction on the planet your on for 7 days for a small fee.

There are a number of shops and malls located across Calypso, at these place you are able to buy almost anything that is on display. On Calypso the easiest mall for any new person to view is at Port Atlantis, which is just east of Camp Icarus.

Shop pad can be located on any player owned land or in any apartment. Unlike shops, apartments are unable to sell what is in the apartment on display, but shop pads are able to be placed and used. Shop pads provide 20 item slots and allows the storage of any item for an unlimited time to sell to other players.

It is good to explore, even as a trader, you never know what treasures you will find going for cheap in some hidden shop pad in someones apartment on a remote part of the map. Entropia is not just a way to spend or invest PED, it is a living breathing universe.


Services

There are many opportunities to earn PED, people provide many forms of services for a fee. Healing, taxi, colouring, texturing, hair cuts and plastic surgery are some of the services that are available.

Healing
Healing is one of the easiest services to get started in as basic healing tools are provided by doing some of the beginning missions.

The cost of this profession is down to the healing tool being used, unlimited items can be repair at a console with no markup cost, for limit items, it is down to how much markup you pay.

To profit, you want to be above this cost of the healing tool, and you want to be effective with the tool you use.

Taxi
With a Quad-Wing Intercepter (L), Space Thruster (L), Oil, Vehicle RK-5 (L) and Welding Wire you have the ability to traverse space safely, and with this, the ability to taxi people to other planets for a fee.

To profit at this you simply have to cover the cost of the Space Thruster (L) and Oil consumption from planet to planet.

Space itself is a loot-able player verse player (PvP) zone, because of this, you will want to make clear to the person you are flying that everything in the "Materials" and "Resources" tabs (hunting & mining loot tabs) of the inventory can be looted in space, and if they do carry loot it is at their own risk. You also should not carry anything in these two inventory tabs.

Vehicle RK-5 (L) and Welding Wire are essential for space flight. It is not a matter of if, but when you will get shot down, and it will happen if you fly in space enough, you will need to be able to repair your ship and continue with your passenger. Without this tool, you and your passenger are in real danger of getting trapped in spaces needing a rescue.  Just as importantly always check your Oil!

No skill is involved in simply flying from location to location, only time, as space is big.

Although a Sleipnir (C, L) can fly in space, it is not recommended to taxi people in space in it. The Sleipnir (C, L) is a very slow vehicle and will take longer to reach your destination. You are also more likely to be shot down due to its slow speed.


Crafting And Customisation
Crafting items to orders, and customising items for a fee is not only a way to make PED but it is also a way to add visual content and expression to the world, allowing people to have their own unique look. Many items offer the ability to customise, if a (C) exists in the items name, it can be customised.

The cost of this profession depend on the costs of the paints, textures, and the degrade of the tools. Painting and texturing have their own separate tools. People can provide their own paint, which can cut back on cost. Skill is highly involved in this profession.


Hair And Beauty
With an apartment or land and the particular chairs designed for hair cutting or plastic surgery, you can charge people for hair cuts, hair colouring and provide plastic surgery. This allows people to adjust how their avatar looks under all their cloths and armour.

The resources required and the cost of the degrade on the chair and tools are the main costs to this profession. People can provide their own hair colour, which can cut back on cost. Like colouring and texturing skill is heavily involved hair and beauty.

To Be A Trader

To be a trader is easy in concept, you just have to keep track of what you spend and earn. Earn more than what you spend, and your winning. All the usual phrases would apply here, like "Buy low, sell high!". If you are good at trading in other MMORPGs, you will easily slip into the role as a trader in Entropia!


You have to be smart with what you can get for what you got, you will need to be pro-active yet patience, and your prices will need to firm yet flexible.

The prices for any item can fluctuate over time, not only this, but there is a vast difference between buying on the street, buying bulk amounts, and buying retail amounts.

Another important aspect to trading is being social and making friends, with out letting people know what you want to buy and sell, how will people know what you want to buy and sell?

There are many types of people in Entropia, from people who just like to hunt for fun now and again to people who are serious full time players. More than often people tend to return to people with friendly helpful attitude for trading.

Here is a real example of how the social aspect can effect trading:
"A few years ago I sold Oil at Camp Icarus when I had a constant supply of it coming in, while I was advertising that I sold Oil, I repaired peoples vehicles for free.
Not only did this help people to continue using their vehicles, consuming more Oil in the process, but also people saw me as a friendly face, and was more likely to return to me for Oil.
The amount of Oil sold covered the cost of repairs and also led many people to return and continue to trade other items with me."

Common Trading Questions


Do people really pay that much markup?
The simple answer is yes, they do. The more complicated version of this answer is down to supply and demand, markets values can fluctuate over time and there is a price difference in the amount sold on the auction. Just like in real life, buying in bulk is cheaper. Just like a shop selling chocolate bars, you do not pay the value based on the whole box, just the bar, and the shop must make enough for

What is a good resource to start trading in?
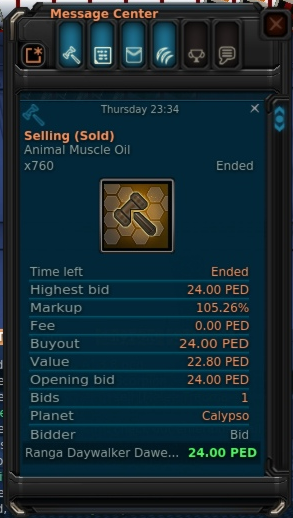
Animal Eye Oil and Animal Muscle Oil are perfect to start trading, not only are they the most traded items in Entropia, they do not need refining before crafting and can be brought and sold directly as they are.

The next step up from that is Lysterium Ingots and Belkar Ingots, These two are the next most traded items in Entropia, just below Animal Eye Oil and Animal Muscle Oil. Ingots are easier to sell than ore, and any ore brought will need to be refined.

Iron Ingot and Caldorite Ingot are the next most sold out of all the resources. These resources are harder sell than the above resources, not only because less are brought, but each single unit has a bigger trade terminal value, this makes it harder to to adjust the percent in the auction. These resources also need to be refined if brought in ore form before selling.

Because of the high market activity of these resources, all these resources are perfect to get started with a small quick turnover, the profit on these will be small, but constant. Other resource tend to be sold in bigger bulks due to their slower market page.

What is what percent?
The best way to get a good idea of the current prices is to look on the auction, the auction with the lowest buyouts on an item is the bulk price of that item. These stacks tend to be the biggest on the auction. Street price is always below bulk price. Smaller stacks on the auction tend to go for higher prices, this is retail price.

What is not good to resell?
Items that are valueless to the system, some of these for an example are: Vibrant Sweat, Blazar Fragment, Nova Fragments, Calypso Bone Samples (Mission). If you intend to buy valueless items, it is best to buy to use, not buy to resell.

If you are looking to invest into something, you will want security, this is provided by the system,
if you spend 101 on 100 PED of resource at trade terminal value, at worse you will lose 1 PED.

If you spend 101 PED on Vibrant Sweat, and the price suddenly drops to half its value, you will lose 50.50 PED.

Wednesday, 27 February 2019

Guide: Crafting Basics

This guide will teach you about the basics of crafting. Here you will learn about using resources gathered from hunting and mining to create clothing, tools, armours, weapons, enhancers, vehicles, furniture and much more.


Crafting Equipment

To craft all you need is a blueprint of what you want to craft and the resources that blueprints requires to craft with. You are able to buy a number of basic blueprints perfect for people new to crafting and blueprint books from a technician.

Blueprint books are not needed for crafting, the books are simply designed to keep your blueprints organised.

You can acquire further blueprints from other players, on the auction or from crafting. There is a small chance of blueprint being created from crafting.

Construction machines are located across the major settlements on any planet in Entropia, these machines along with your blueprint and resources needed for construction is what you use to construct with.

To find out what resources a blueprint requires, right click the blueprint to bring up the item information screen. You can also see this information from a construction machine.

To acquire the resources needed, learn more about trading here.

Construction Machine

Once you have the blueprint and resources required for the blueprint, right click on a crafting machine. You will see the following window with a list of blueprints you currently own.


Here you have an overview of each blueprint, its success rate and how many attempts you currently have with the resources you got. Note that this includes resource stored in storage on that planet, not just resources in your current inventory, and this is also solely determined by ingredients, and is not the same as the number of attempts left on a limited blueprint.

Clicking on any of these blueprint will highlight addition information at the bottom of the window including the resource you have and require for the construction.

The filter button at the top of this window will allow you to filter and search what blueprint you want show.

Double clicking any of these blueprint in the list or clicking the construction tab at the top of the window will take you to the highlighted blueprints construction screen.


Construction

This next screen will show a number of buttons and dials. From here you will be able to select how many construction attempts you wish to undertake and adjust your focus to quantity and condition.


The quantity and condition bar will adjust your level of success compared to the quality of your outcome. Quantity will provide a better success rate, but each construction will be mediocre in value. Condition will offer higher value results, but will be more likely to fail in each construction.

When you are confident with the choice you have made, the construct will start the construction, the stop button will halt production.


Quality Rating/Condition (QR/CD)

If the blueprint is unlimited, the number displayed is the quality rating of that blueprint. If the blueprint is limited, the number displayed is the condition of that blueprint.

As you use a unlimited blueprint, there is a chance the blueprint quality can be improved leading to better success with the blueprint in the future. Limited blueprint do not improve over time.


Residue

The residue options in the top right of the window allows you to fill in the value of a tool or weapon. Residues are produced as a byproduct from crafting different materials. 

When constructing limited items, you will want to create items with the maximum trade terminal value, when constructing without residue the value of an item will more than likely be under its maximum value, this can make an item harder to sell.

Residue is used to fill in the remaining value on an item to create items with maximum trade terminal value.


Male Or Female?

If you are constructing a clothing or armour blueprint, two buttons, “Male” and “Female”, will appear. These buttons allow you to choose for which gender the item should be designed. Males cannot equip female clothing or armour, and vice versa.


Supply And Demand

The most important factor to whether a crafter is successful or not is their ability to understand the cost of what it is they are crafting and peoples demand for what is being crafted. Every profession requires a little bit of trading savvy to be successful, as it is an integral part of the game, but non more so than crafting is the ability to trade most important.

First you must understand your ability to produce the item in question, if your success rate is 80%, you must understand that roughly one in every five times you will fail, and must be factored in.

The second thing you must factor in, is the price of the resources you wish to purchase, it is easier and cheaper to buy the resources needed than to go out and find the resources yourself.

Thirdly and one of the more important factors is the ability to sell what you produce, demand is an important factor in trying to sell an item.

Many miners will refine their own resource before selling, but hunter do not tend to refine hides or wools, where as a crafter you are more likely to look for refined resources when buying, sometimes it might be worth looking the unrefined forms. Although refining is not needed it maybe handy.

Finally, you never want to sell anything you produce back to a trade terminal, the best way to sell loot is to another player, you will always get more PED from a player than you would from a trade terminal. Anything you are unable to sell, save in your storage to sell later.

To learn more about trading in general click here.


Guide: Mining Basics

This guide will teach you about the basics of mining. Here you will learn about locating ore and energy matter veins, extracting resources and summoning from claim deeds.


Equipping Equipment And Basic Controls

To view your inventory press "I", here you can access your mining equipment under the tools tab. Right click the item to access its options. From here you can view details of an item or equip an item by right clicking it. Mining equipment consists of a detector, an extractor and mining probes.

The "E" key (Default) is to use a tool, the "F" key (Default) is to auto-use the extractor.

You are able to create custom controls to use tools, auto use tools and to quickly switch between detector an extractor, you can learn more about the edit panel here:
Guide: Edit Interface


Detecting Ore And Energy Matter

When you have any detector equipped you will see the detector window, in this window you are able to see a radar with 3 buttons below, these buttons are for selecting which type of type of resource the detector should search for.

The first button is to search for matter, the second button is to search for energy matter, and the last button is used
for searching for treasures on certain planets. The treasure option is specific to some planets, and will be unavailable on some planets.

Over the right bottom side or the detector window, the detector will display how many mining probes each detection attempt will use, devices that use more probes tend to find bigger deposits, but this is also highly dependent on skill level.

A smaller mining range contains larger findings that are more difficult to find compared to a larger
mining range with smaller findings that are more easy to find.

Mining probes and basic mining equipment can be purchased from a trade terminal. If you are under level 10 it is recommended that you use equipment in the trade terminal or from the starting missions. Some other detectors you can use under level 10 are, Finder F101, Ziplex Z1 Seeker, Rookie TerraMaster, Genesis Star Rookie Finder (L), Imperium Trainee Finder (L) and TerraMaster 1 (L)

When you have selected what you want to detect and are standing where you want to mine, right click the ground or press "E" (default key) and use your tool, or use what ever control method you prefer to use the tool.

Once a probe has been dropped, the detector window will display if a deposit has been found or not. If a deposit has been found a claim beacon will appear in the world, a claim deed will be placed in your inventory and the detector will guide you to the location of the claim beacon. The detector will also display additional information about the claims it finds, the range, the depth and what resources it has found if this information is available.

Summon Claim And Extract

To extract resources you simply have to equip and use an extractor on a claim beacon that you own, click the claim beacon and press "F" (Default Key) start auto extracting. If you are unable to reach a claim beacon due to the terrain being awkward, you are able to summon claims close to you using the claim deed placed in your inventory.


Track Your Findings

If you want to mine the most efficient way, you need to spend a little money on locating a good mineral field. The best way to do this is testing new locations, it is a good idea to keep a records of your finding locations and resource type. Each area is be unique in what resources you find, try many locations for different resources.

With a mixture of sticky notes and waypoint links, storing this information in game with no extra tools can be very easy. To learn more about sticky notes, chat commands and keyboard controls, click here: Guide: Edit Interface


Amplified mining

You can attach attachments to your detector tool to help improve your ability to find resources. Although it has the potential to cost more to use, the chances of finding larger amounts of resource are a lot more likely.

To equip attachments to an items, simply drag the attachment to equipment it is designed for. To view what attachments are attached to an item, view its item info. On the item info screen you will be able to individually detach attachments.


Limited And Unlimited Equipment

Some equipment can be repair and some equipment is disposable once used. Items with an (L) in the name are limited items. Limited items can not be repaired and are disposed of when they can no longer be used by selling them to the trade terminal. Items without the (L) in the name can be repaired at a repair console for PED.


Tier And Enhancers

Equipment has the ability to level up to unlock sockets, this is known as the tier level of an item. Sockets allow you to add enhancers to equipment to modify the statistics of an item.

Limited (L) items have the ability to unlock sockets when they tier up automatically, and continue to level up. Unlimited items require resources to tier up when they reach the required level to unlock a socket and continue to level up. When an items is ready to be upgraded, the resources used in the upgrade will be converted to shrapnel.

Enhancers can be attached at the bottom of the equipment info screen. Each enhancer can only be attached to the sockets number equal to the enhancer level, for example, a Mining Finder Depth Enhancer 2 will only go into the second socket of a mining detector device. Enhancers can stack and do not degrade like other equipment, rather they have chance of one being destroyed every time you use the item.

The chances of this happening is very small, but because the chances of enhancers break is down to luck, you can use one for ages and then break few in a row. Enhancers have a lower chance of breaking on a limited tool. When enhancers break they will return the trade terminal value in shrapnel.


Loot!

When you have finished mining, you will want to sell your loot, the best way to sell loot is to another player, you will always get more PED from a player than you would from a trade terminal. Anything you are unable to sell, save in your storage to sell later.

Many miners will refine their own resource before selling, not only to help with weight when going out on longer mining runs, but it also helps with selling the resources, a crafter is more likely to look for refined resources when buying. Although refining is not needed, as many resellers are happy to buy ore and refine it to sell.

This is a very important factor to whether a miner is successful or not. Every profession requires a little bit of trading savvy to be successful, as it is an integral part of the game.

To learn more about trading in general click here.

Guide: Hunting Basics

This guide will teach you the basics of hunting. Here you will learn about weapons, healing, armour,  attachments and other combat enhancing items.


Equipping Equipment And Basic Controls

To view your inventory press "I", here you can access your healing tools, armour parts and weapons. Right click the item to access its options. From here you can view the details of an item or equip an item by right clicking it. Clothing is purely aesthetic and does not offer protection of any kind.

To target a creature simply click on it, an arrow will appear above the creatures head with the name and level of the creature and the health bar of the creature. Click the creature again to use your equipped weapon. The "F" key (Default)  will auto fire.

To target yourself for healing, you can use your health bar on your HUD while your healing tool is equipped. To heal others you can click their avatar, or if in a team their health bar. The "F" key (Default)  will auto heal. You can use the use tool key "E" (Default).

You are able to create custom controls to auto fire and to quickly switch between weapons, tools, and armour sets, you can learn more about the edit panel here:
Guide: Edit Interface


Weapons

Doing more damage is not simply down to buying a better weapons, skill is heavily involved in your ability to inflict damage and your ability to be accurate with a weapon. Using a weapon far above your skill level will cause you to waste ammo on missed shots and weaker damaging hits.

There are many types of weapons. Short blades, long blades, pistols, rifles, laser, BLP(bullets), explosives are a few examples. Using a weapon of one type can help improve skills in using other weapons, for example, using a laser pistol will give skill in laser rifles and BLP pistols.

Close combat weapons will help improve strength, which will improve your carrying capacity. Close combat can also increase your maximum health points. Some of the skills even carry across into other professions like weapon crafting skills, for example laser weapon technology.

If you are under level 10 in any skill it is recommended that you use the weapons in the trade terminal in game, use the starter pack on the web store, or use any of the weapons acquired from the new player missions. Weapons can also be purchased from other players in game for a markup. Ammo can be purchased from a trade terminal or converted shrapnel.

Some of the weapons suitable for under level 10 include: Solomate Rubio (L), Solomate Onyxo (L), Sollomate Azuro (L), EWE EP-1 Neutron (L), EWE EP-2 Proton (L), Skildek P30 (L), Skildek Lancehead (L), Castorian Combat EnBlade-B (L), Solomate Opalo, Bukin's Spare Rifle, Z12 Barbarella, Omegaton M2100, Castorian Combat EnBlade-A.

To be efficient in hunting you want a weapon which has the most bang for bucks, not only in ammo consumption for damage, but also how much markup you pay for a weapon. To be effective in hunting, just like any other professions, you want be smart on what you spend on your equipment.

A good example of being smart with what you have is buying shrapnel for 100.1% to 100.9% and converting it to universal ammo, as every 100 shrapnel converts to 101 ammo, buying shrapnel under 101% and converting it will provide more ammo than just simply buying it from a trade terminal


Defence And Healing

Getting hit in close combat will help improve evasion skills and getting shot will help improve dodging skills. Using close combat weapons can also increase your maximum health points. These abilities will naturally make you more resilient in combat. Evade and dodge can save you PED in healing and armour repair and replacement costs.

With the weaker robots and animals in Entropia, armour is not needed, but a healing device is an essential. Most of the lower level creatures will not be able to out damage most of the basic healing tools.

There are 7 armour parts to each armour set, hands, arms, head, chest, thighs, shins and feet. Some armours sets have a special ability when all parts are worn. For example the gold and platinum starter pack Adjusted Harrier Armour grants an extra 8% to running speed when the full set is equipped.

Every armour protects against certain types of damage, where some armour sets maybe more suited to hunting a creatures with particular types of damage, hunting creatures your armour is not designed for will offer little protection and will cost more in repairs and replacement.


Attachments

You can attach a number of attachments to your equipment to improve its statistics. A gun can be equipped with an amp, laser sight and scope to enhance damage,  accuracy and skill gain ability. Armours can have plating attached to enhance its defence. Every one of these attachments have their own trade terminal value and degrades like any other equipment.

To equip attachments to an items, simply drag the attachment to equipment it is designed for. To view what attachments are attached to an item, view its item info. On the item info screen you will be able to individually view and detach each attachments.

When an attachment runs out of trade terminal value, the weapon will no longer fire until the attachment it detached or repaired.


Limited And Unlimited Equipment

Some equipment can be repair and some equipment is disposable once used. Items with an (L) in the name are limited items. Limited items can not be repaired and are disposed of when they can no longer be used by selling them to the trade terminal. Items without the (L) in the name can be repaired at a repair console for PED.


Tier And Enhancers

Equipment has the ability to level up to unlock sockets, this is known as the tier level of an item. Sockets allow you to add enhancers to equipment to modify the statistics of an item.

Limited (L) items have the ability to unlock sockets when they tier up automatically, and continue to level up. Unlimited items require resources to tier up when they reach the required level to unlock a socket and continue to level up. When an items is ready to be upgraded, the resources used in the upgrade will be converted to shrapnel.

Enhancers can be attached at the bottom of the equipment info screen. Each enhancer can only be attached to the sockets number equal to the enhancer level, for example, a Weapon Damage Enhancer 2 will only go into the second socket of a gun. Enhancers can stack and do not degrade like other equipment, rather they have chance of one being destroyed every time you use the item.

The chances of this happening is very small, but because the chances of enhancers break is down to luck, you can use one for ages and then break few in a row. Enhancers have a lower chance of breaking on a limited tool. When enhancers break they will return the trade terminal value in shrapnel.


Other Useful Equipment

A number of other useful items exist to enhance your combat capability and efficiency. Everyone has access to loot collection pills, these pills can be purchased from any trade terminal and costs 0.50 PED per pill. Loot pills can automatically collect loot from dead creatures within 20 meters and each pill lasts for an hour.

This is just one of many of the combat enhancing drugs that can be purchased, Neurobiotic Boosters provide a skill boost bonus and different Neurostims provide different boosts, reloading speed boosts, health regeneration, faster running speed, are some for example.

Rings also provide an improvement to your abilities in combat by providing a constant boost to your statistics. Rings provide effects like pills, but without the short time limit. Each player can wear 1 ring per hand, check on the ring's information screen to see which hand it is for. Rings are classed as clothing and are found in the clothing tab.


Loot!

When you defeated you pray, do not forget to collect your loot, the "F" key (Default) will loot your target. When you have finished hunting, you will want to sell your loot, the best way to sell loot is to another player, you will always get more PED from a player than you would from a trade terminal. Anything you are unable to sell, save in your storage to sell later. Some of the hunted items are easier to sell after being refined.

This is a very important factor to whether a hunter is successful or not. Every profession requires a little bit of trading savvy to be successful, as it is an integral part of the game.

To learn more about trading in general click here.

Tuesday, 26 February 2019

Event: Entropia Mardi Gras 2019 and Crowning of the Mardi Gras King 2020


Entropia Mardi Gras 2019

A Free For All Parade Through Arkadia.

Mardi Gras Colours are Nusul, Hornet and Carabok

* VIP Access to event Area: 20 PED. *
("B" is the default key to access the in game event list.)

Crowning of the Mardi Gras King 2020


Aakas Island, Arkadia. 
00:00 to 01:00 EU time, March 2nd 2019.
A limited number of tickets will be sold at the events list, additional tickets will be sold at a markup.


Throws are for everyone on the parade route. You do not need to buy a ticket to spectate or get free stuff.

Purchase of tickets will allow access to reserved throws after the parade at the event area.

The event area will be restricted to those who have registered for the event.

A limited number of tickets will be sold at the events list, additional tickets will be sold at a markup, so get in there fast to reserve your seat at the event today!


The parade route is as follows:
Celeste Quarry: nick nikita3003 OP - Marquee of The Quarry
No Vehicles allowed. Walking parade from TP, up ramp on one side, down the other (A stop for dancing in the middle) and back to the TP. Music supplier would be awesome.

Outpost: Kain Dewey Fall - Jari of Outpost
Around the Container, past stable and sweat circle area, to TP. Kill a Nusul for luck. Spectators should Spawn vehicles to define the route.

Celeste Island: lastman last77 kenoa - Duke of Celeste Harbour Island
Spawn Parade Vehicles up the dock before the event. King and Court in front. King will set pace, parade vehicles will not run over or pass vehicles in front until the torch is passed to the next governor. The torch will be passed at South.

Celeste Harbour South: Kasey DIE Jones - Tamaraq of Celeste Harbour South
From south TP to Harbour TP. by the second road of shops. The torch will be passed at Harbour, by the crafting house.

Celeste Harbour: - Felix Wizard: Baron of Celeste Harbour
Exit vehicles and take the parade through the crafting house to distribute throws. Up the right street to Celeste North TP.

Celeste Harbour North: Demi Deminish Nishap - Countess of Celeste Harbour North
Down 2nd road back to the Bar. Once the torch is passed to the King, no more throws will be distributed.

10% of throws should be reserved for the after party on Aakas.


For More Information:
Visit the original post on Arkadia Forum

Monday, 25 February 2019

Guide: Sweating

This guide will teach you all about sweating animals within Entropia. The only tool that is needed is the VSE MK1, which every player gets right from the start, but a healing tool and a vehicle will be handy for this guide. (Valkyrie car can be acquired from Thule the tutorial area, and a Vivo S10 healing tool can be acquired from the gauntlet).

Note: The VSE MK1 can not be brought or sold, but can be put in storage, it is advised that you keep this gun on you at all time. If you go to another planet and leave your sweating device behind, you will not be able to sweat buy a new one, and the only way to get your one back is to go back to the planet you have stored it at.


Simple Sweating

To start sweating, simply go to the tools tab in your inventory (I on keyboard), and right click on the green round gun called the VSE MK1 to equip it. Then find a creature sweat,  click to target it, then press "F" key (Default), after a few attempts, you will see a green mist, this is the extracting phase.

In the extracting phase if you get hit or the creature moves out of your range, you will fail to extract. If you do not get hit and you keep the creature in your cross hairs for a few seconds, you will acquire some sweat.

After a number of extractions the creature will run dry on sweat, after this you will want to kill it, most people run to a turret and some shoot it, you can also drown the creature in water.

The skills you will gain while sweating are also valuable in a number of other professions, including hunting, mind force, and healing. With a tiny increase to other skills not related to these.


Group Sweating Locations

There are a number of locations where players sweat in a group to share damage to last longer, heal less and get more sweat. Overall this method will provide much more sweat in a shorter time but you will acquire less evade experience.

If the animal hits you, do not move and do not panic, it is not worth running, if the creature can hit you, it will hit you, moving does not effect your ability to evade a hit. If anything, the more you get hit, the more likely you will gain evade experience, the more likely you will be able to evade hits in future. The ability to evade is one of the more sought after skills for a hunter.


The easiest group sweating location to get to is Boreas. Teleport to the Isle of Troy then travel west to the edge where the land is no longer a solid green. From there you will be able to teleport or die and revive at Boreas. This is where a vehicle could come in handy.


Selling Sweat

The VSE MK1 does not degrade. You can use it as much as you want. This is one of the free abilities in Entropia, Sweat in itself is a valueless item to the system.
The value of sweat to a buyer depends on their needs for the sweat, and to a seller the value depends on their persistence to always be patient and look for a better price.

When it come to selling sweat, patience is a virtue, everyone has the ability to sweat, but not everyone has the ability to craft using that sweat, this means sweat is in a much higher supply than demand.

The best places to find buyers is at a group sweating locations, when a buyer wants to buy, the first thing they think is "Where are there lots of sweaters?".

These buyers tend to come and go in moments compared to how long sweaters sweat for at these locations. Calling out  "WTS Sweat" will not help, almost everyone wants to sell sweat.

The best thing you can do is to sweat a bit more to sell more for when that valuable buyer comes by, and when that buyer does come by, make a note of that persons name and their price, make a friend, and sell for the best price you can. Sweat is normally sold in stacks of 1000, check with other sweaters for the average selling price at the time so you know what to aim for and you are not undercutting yourself.

To learn more about trading in general click here.


Uses For Sweat

Last but not least, many new people wonder what sweat is actually used for. The top 3 uses for sweat are making mind essence, making welding wires and missions.

Mind essence can be made by mixing force nexus and sweat in a refiner. Force nexus is an energy matter that is mined. You are able to purchase a standard refiner from a trade terminal.

Some blueprints like the welding wire blueprint requires sweat along with other materials, welding wires are used like ammo with the vehicle repair tool to repair vehicles.

There are also a number of missions that require sweat to complete, a few examples of these are the Arkadia Passport missions and Missions Galactica.